How to Improve Braking Performance in Electric Carts

Time:2026-10-19 Author:Aria
0%

How to improve braking performance in electric carts is not a question of simply installing stronger brakes. It requires a complete review of speed, load, tires, terrain, battery weight, and maintenance conditions. A cart carrying four passengers behaves differently on wet grass, concrete, or a downhill path. Small details matter.

ANSI/ITSDF B56.8 provides safety guidance for powered industrial trucks, including braking, control, and operating conditions. The U.S. Consumer Product Safety Commission has also reported thousands of golf-cart-related injuries annually, showing why predictable stopping performance deserves serious attention. NHTSA research repeatedly identifies vehicle condition, speed, and driver behavior as connected safety factors. These findings apply differently to low-speed electric carts, but they still offer useful direction.

Vehicle-dynamics expert Dr. Thomas D. Gillespie famously explained, “The tire is the only part of the vehicle that contacts the road.” That principle shapes this guide. Brake pads may be new, yet worn tires can lengthen stopping distance. A weak battery can also reduce regenerative braking, especially on slopes. Not every cart needs the same solution.

This article examines practical methods for how to improve braking performance in electric carts, including brake inspection, tire selection, load control, regenerative-braking settings, and controlled stopping tests. Some recommendations may appear obvious. They are often ignored. Real improvement comes from measuring stopping distance repeatedly, not trusting a quick driveway test. Industry standards help, but operating environments remain imperfect. Wetter, heavier, and older carts need more cautious decisions.
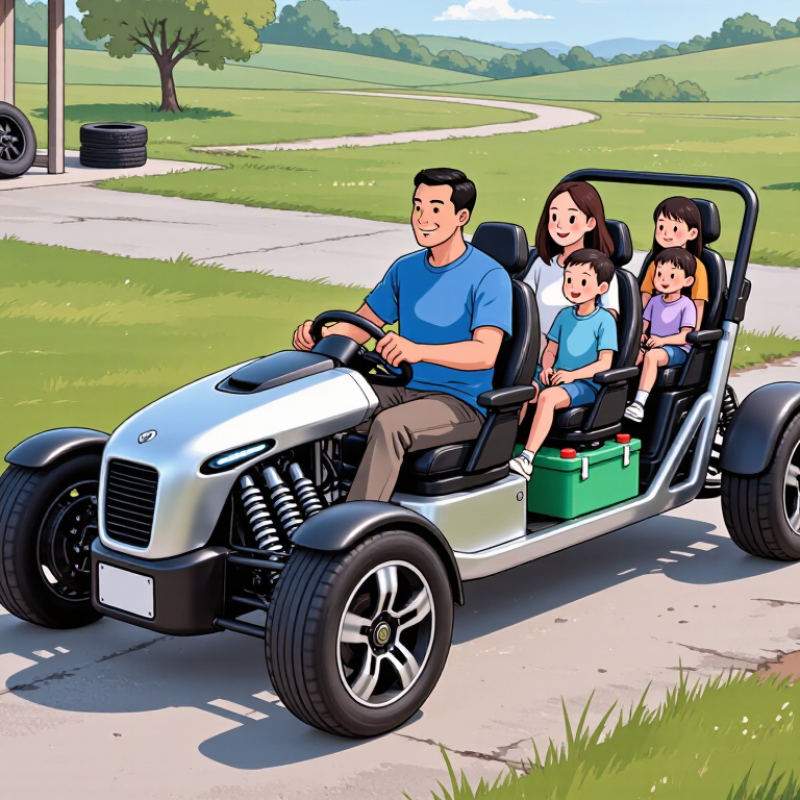
How to Improve Braking Performance in Electric Carts

Understanding Electric Cart Braking Systems

How to Improve Braking Performance in Electric Carts

Understanding the braking system is the first step toward safer electric cart operation. Most carts combine mechanical service brakes, a parking brake, and regenerative braking. The mechanical system creates stopping force through pads or shoes pressing against a disc or drum. Regenerative braking slows the motor and returns limited energy to the battery. It cannot replace the service brake.

Battery condition can affect regenerative braking. A fully charged battery may accept less recovered energy, reducing motor resistance on slopes.

Wet roads, loose gravel, and underinflated tires also increase stopping distance. Small details matter.

During inspection, check pedal travel, cable tension, brake fluid, pad thickness, and drum adjustment. Look for uneven wear or grinding sounds.

A controlled, low-speed test can reveal problems before normal use. The cart should stop evenly without pulling sideways or vibrating. Test the parking brake on a gentle slope, while keeping the area clear.

A quick check is not enough. Brake components can appear clean but still perform poorly under heat.

One common mistake is adjusting the cable too tightly, which may cause drag and premature wear.

Follow the vehicle’s service limits, and ask a qualified technician to inspect hydraulic or electrical faults. Records of inspections can also reveal gradual performance changes.

Identifying Common Causes of Poor Braking Performance

How to Improve Braking Performance in Electric Carts

Poor braking usually begins with simple mechanical problems, not electronic failure. Worn brake pads reduce friction and increase stopping distance. Glazed surfaces may feel smooth but grip poorly. Rusty drums can create uneven braking, especially after wet storage. Low tire pressure also reduces traction. The U.S. Department of Energy explains that regenerative braking recovers energy normally lost as heat, but it cannot replace properly adjusted friction brakes. At low speeds, regeneration may weaken noticeably. That detail is often missed.

Weight changes matter. Extra passengers, tools, or cargo increase momentum and heat. A cart that stops well when empty may feel unsafe on a slope. The World Health Organization reported about 1.19 million road deaths worldwide each year, showing why basic braking checks deserve serious attention. Electric carts operate at lower speeds, but poor stopping control can still cause crushing injuries. I have seen operators blame the controller when a loose cable caused delayed braking. Assumptions can be expensive.

Tips: Check tire pressure before use. Inspect pad thickness weekly in busy fleets. Clean drums after muddy operation. Test braking on flat ground, then repeat on a gentle slope. Watch for pulling, squealing, vibration, or a soft pedal. The U.S. National Highway Traffic Safety Administration recommends regular tire inspection because inflation and tread condition affect vehicle control. Follow the cart maker’s service limits, and record every adjustment. A short log often reveals repeating faults. Painfully, many inspections remain too visual; measuring cable travel and stopping distance gives better evidence.

How to Improve Braking Performance in Electric Carts - Identifying Common Causes of Poor Braking Performance

Common Cause Typical Symptoms Recommended Inspection Corrective Action Useful Service Limit or Target Safety Priority
Worn brake pads or shoes Longer stopping distance, grinding noise, reduced braking force, or metal-to-metal contact. Remove the wheel or inspection cover and measure the remaining friction material with a suitable gauge. Replace worn friction components as an axle set. Clean mating surfaces and follow the bedding-in procedure. Replace before the manufacturer’s minimum thickness. If no limit is available, investigate immediately when the lining approaches approximately 2 mm. High
Contaminated friction surfaces Sudden loss of friction, pulling to one side, squealing, or inconsistent braking after lubrication or water exposure. Check pads, shoes, rotors, and drums for oil, grease, brake fluid, mud, or excessive moisture. Replace oil-soaked friction material. Clean compatible metal surfaces with approved brake cleaner and correct the source of contamination. Friction surfaces should be dry, clean, and free from visible oil or grease. High
Improper brake adjustment Excessive pedal travel, delayed engagement, dragging brakes, or unequal braking between wheels. Measure pedal free play, cable travel, actuator movement, and shoe-to-drum clearance where applicable. Adjust according to the service manual. Confirm that the wheels rotate freely when the brake is released. Use the vehicle-specific free-play and clearance specification; do not tighten the system until the brakes drag. High
Stretched, damaged, or corroded cables Soft or inconsistent pedal feel, delayed brake response, visible fraying, or limited actuator movement. Inspect cable routing, outer casing, anchor points, bends, corrosion, and exposed strands. Replace damaged cables. Route them without sharp bends and secure them to prevent rubbing or excessive flexing. No broken strands, severe corrosion, crushed casing, or binding should be present. High
Low hydraulic fluid or air in the system Spongy pedal, pedal sinking, reduced braking force, or visible fluid leakage. Check fluid level, hose connections, calipers, wheel cylinders, and the master cylinder for leaks. Inspect fluid condition. Repair leaks, refill with the specified fluid, and bleed the system using the correct sequence. The pedal should feel firm and remain stable under sustained pressure; fluid must meet the specified type and condition. Critical
Glazed, scored, or overheated rotors and drums Shuddering, vibration, hot-brake odor, reduced friction, or braking that improves after cooling. Measure thickness and runout. Look for blue discoloration, heat cracks, deep grooves, or an uneven contact pattern. Replace or machine components only when within allowable specifications. Correct sticking calipers or overloaded operating conditions. Keep thickness, diameter, and runout within the vehicle manufacturer’s limits. High
Sticking caliper, wheel cylinder, or actuator Vehicle pulls to one side, one wheel becomes unusually hot, or the brake fails to release fully. Compare wheel temperatures after a controlled test. Check piston movement, slide pins, return springs, and actuator travel. Clean and lubricate approved sliding points, replace seized components, and verify complete release. Left-to-right temperature difference should be investigated when it is clearly abnormal or accompanied by pulling or odor. High
Underinflated or mismatched tires Longer stopping distance, unstable handling, uneven tire wear, or reduced grip on wet surfaces. Check cold tire pressure, tread depth, tire condition, load rating, and size compatibility. Inflate to the vehicle’s recommended cold pressure and replace damaged, excessively worn, or incompatible tires. Maintain the specified cold pressure. Replace tires at the applicable legal or manufacturer tread limit. High
Excessive load, steep gradient, or high speed Longer stopping distance, brake fade, overheating, or reduced control on slopes. Compare operating conditions with the rated payload, approved speed, gradient capability, and duty cycle. Reduce speed, stay within rated capacity, use controlled downhill driving, and allow brakes to cool between repeated stops. Never exceed the cart’s rated payload or maximum operating speed. Critical
Electrical or regenerative braking fault Warning indicator, reduced motor braking, intermittent deceleration, or a change in braking behavior after low battery voltage. Check diagnostic codes, battery voltage, wiring connectors, brake switch operation, controller inputs, and emergency mechanical braking. Repair wiring or sensors, test the controller system, and confirm that mechanical brakes operate independently and effectively. Regenerative braking should supplement, not replace, properly functioning friction brakes. Critical
Insufficient maintenance or poor bedding-in Uneven contact marks, noise, variable stopping performance, or reduced friction after installing new components. Review maintenance records and inspect contact patterns, hardware, mounting surfaces, and component alignment. Use correct hardware, torque fasteners to specification, align components, and perform gradual bedding-in in a safe area. Complete a controlled functional test after every brake repair and record any abnormal noise, pull, or vibration. High

Important: Service limits, fluid specifications, adjustment procedures, load ratings, and stopping-distance requirements vary by vehicle design. Always follow the applicable service manual and local safety regulations. Remove the cart from service if the brake pedal feels abnormal, fluid is leaking, a warning indicator is active, or braking performance is inconsistent.

Inspecting and Maintaining Braking Components

How to Improve Braking Performance in Electric Carts

Inspecting and maintaining braking components is essential for safe, predictable stopping. Park the cart on level ground before checking anything. Press the brake pedal several times. It should feel firm and return smoothly. A soft pedal needs immediate attention.

Examine brake pads, shoes, drums, and rotors for uneven wear, cracks, or deep grooves. Remove loose dust with approved cleaning methods, but avoid breathing the dust. Check cables and linkages for fraying, rust, or restricted movement. Lubricate only the points recommended by the service manual. Hydraulic systems need clean, correctly specified fluid. Never mix incompatible fluids. Inspect leaks around hoses, fittings, and the master cylinder.

I once found a slightly loose linkage during a routine inspection. The cart still stopped, but the pedal travel had increased. That small warning deserved more attention. Tighten fasteners to the manufacturer’s torque requirements, not by guesswork. Replace damaged springs, worn friction parts, or stretched cables promptly. After maintenance, test the brakes at walking speed in an open area. The cart should stop evenly without pulling, grinding, or vibrating. Recheck the parking brake on a gentle slope. If braking remains inconsistent, stop using the cart and consult a qualified technician. A quick inspection can miss hidden wear. Mine have.

Higher boiling points help brake fluid resist vapor formation during repeated or heavy braking. DOT 4 and DOT 5.1 fluids provide greater thermal reserves than DOT 3, but the fluid type must match the electric cart manufacturer’s specification. Inspect the fluid condition and replace it at the recommended service interval.

Upgrading Brake Hardware and Control Systems

How to Improve Braking Performance in Electric Carts
Upgrading brake hardware starts with matching components to the cart’s actual weight and speed. A heavier load needs stronger calipers, thicker rotors, and pads that resist heat fade. Inspect the brake lines for swelling, leaks, or sharp bends. Small defects can become serious during repeated stops.
Do not ignore pedal feel. A firm pedal should produce predictable braking without excessive travel. Adjusting the pedal ratio or replacing a weak master cylinder can improve control. However, more braking force is not always better. Excessive front braking may lock the front wheels and reduce steering stability. Test the cart on dry and wet surfaces, both unloaded and fully loaded. Measure stopping distance. Record brake temperatures after repeated runs.
The control system also deserves careful attention. Regenerative braking should support friction brakes, not replace them. A speed sensor, pressure sensor, and motor controller must communicate smoothly. Sudden transitions can unsettle the cart, especially on slopes. Set conservative limits and provide a clear fallback when a sensor fails. The friction brakes should remain available.
Keep the design serviceable. Technicians need easy access to pads, connectors, and diagnostic data. I once treated a software setting as the main problem, but the real cause was uneven pad wear. That mistake was useful. Hardware checks must come before software changes. Document every adjustment, inspection result, and road test. Reliable braking comes from repeatable evidence, not a confident guess.

Testing and Optimizing Braking Performance Safely

How to Improve Braking Performance in Electric Carts

Testing and Optimizing Braking Performance Safely

Reliable braking begins with a controlled test area, not a faster lap. Use a flat, dry surface away from pedestrians and traffic. Wear suitable protective equipment, and keep a trained observer nearby. Check tire condition, brake fluid, cables, pads, and battery connections before every session. A loose cable can distort the entire test.

Record a baseline at a fixed speed and load. Measure stopping distance, pedal effort, and the time until the cart stops completely. Repeat each run at least three times. Small details matter. Note surface temperature, battery charge, and tire pressure. My early tests varied too many factors, so the results looked convincing but proved unreliable. That mistake still influences my test sheets.

Change only one setting at a time. Adjust brake bias, pedal response, or regenerative braking gradually. After each change, check for wheel lock, pulling, unusual noise, and excessive heat. Let the brakes cool between repeated runs. A cart that stops quickly once may fade during continuous operation. If regenerative braking feels abrupt, reduce its initial force and retest friction-brake engagement. Keep a dated record of every adjustment, measurement, and failed attempt. Stop immediately when control feels unpredictable, and have a qualified technician inspect the system before further testing.

FAQS

How should I begin a brake inspection on an electric cart?

Park on level ground before checking the system. Press the pedal several times. It should feel firm and return smoothly. A soft pedal needs immediate attention.

Which braking parts should I inspect?

Check pads, shoes, drums, and rotors for uneven wear. Look for cracks, deep grooves, or damaged surfaces. Inspect cables and linkages for rust, fraying, and restricted movement.

How can I handle brake dust safely?

Remove loose dust with an approved cleaning method. Avoid breathing the dust. Use suitable protective equipment during cleaning. Small details matter.

What should I check in a hydraulic braking system?

Use clean fluid with the correct specification. Never mix incompatible fluids. Inspect hoses, fittings, and the master cylinder for leaks. Fluid around a fitting deserves attention.

When should damaged braking parts be replaced?

Replace damaged springs, worn friction parts, and stretched cables promptly. Tighten fasteners to the specified torque. Do not rely on guesswork.

How can I test braking performance safely?

Use a flat, dry area away from people and traffic. Test at walking speed first. Keep a trained observer nearby. Stop testing if control feels unpredictable.

What measurements make brake tests useful?

Record stopping distance, pedal effort, and full stopping time. Use the same speed and load for each run. Repeat every run at least three times.

Which conditions should I record during repeated tests?

Note tire pressure, battery charge, surface temperature, and brake temperature. Let the brakes cool between runs. A quick test can hide brake fade.

How should I adjust braking settings?

Change only one setting at a time. Adjust brake bias, pedal response, or regenerative braking gradually. Check for pulling, wheel lock, noise, and excessive heat.

What should I do if braking remains inconsistent?

Stop using the cart and consult a qualified technician. Recheck the parking brake on a gentle slope. My early tests changed too many factors, so their results looked convincing but were unreliable.

Conclusion

Improving electric cart braking begins with understanding how the braking system works, including the interaction between the brake pedal, cables or hydraulic lines, calipers, drums, pads, and control electronics. Poor performance may result from worn friction materials, incorrect adjustment, contaminated surfaces, low fluid levels, damaged components, uneven tire pressure, or excessive load. A careful inspection and regular maintenance schedule can help identify these issues before they affect safety.

To learn how to improve braking performance in electric carts, operators should clean and adjust braking components, replace worn parts with compatible hardware, and inspect electrical controls for proper response. In some cases, upgraded brake components or improved control settings may provide smoother and more consistent stopping. After every repair or upgrade, testing should be performed in a controlled area at low speed, gradually checking stopping distance, pedal feel, stability, and repeated braking performance. Any abnormal noise, pulling, fading, or delayed response should be corrected before normal operation resumes.

Aria

Aria

Aria is a dedicated marketing professional with a deep passion for innovative strategies and a keen understanding of our company's product offerings. With a wealth of experience in the industry, Aria excels at crafting engaging content that highlights the unique features and benefits of our......